After the manexSQL application folder is unzipped into your "C://inetpub/wwwroot/" folder (as described in the previous step), you must set up the Web.config file so the application can connect to your SQL database.
Do not use an outdated Web.config file from a previous version of manexSQL. You must use a Web.config file with a matching version of manexSQL to avoid errors.
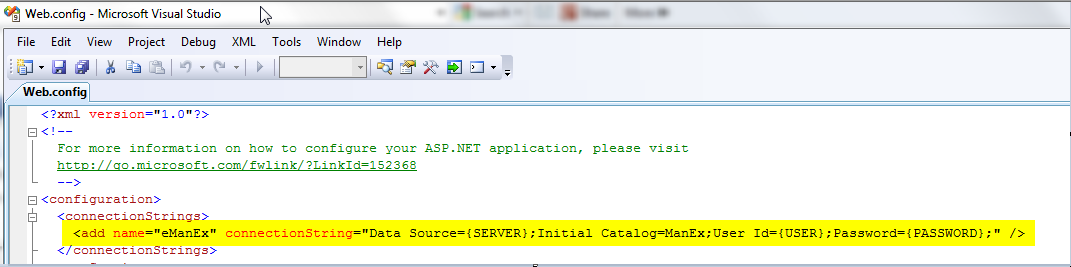
Each time you update manexSQL, you will need to adjust the connection string information as displayed in the image below.
Note: The manexSQL client server and manexSQL are only compatible with SQL 2008 R2 and newer versions, but we recommend using Server 2014 or later to take advantage of all features.
Open the Web.config file and find the entry for the following:
<add name="eManEx" connectionString="Data Source={SERVER/INSTANCE};Initial Catalog=ManEx;User Id={USER};Password={PASSWORD};" />
You will need to edit this information to the required connection information for your SQL database. Typically, it will have the same values used in the ManEx.ini file used to connect your desktop application.
The modified string should look something like this:
<add name="eManEx" connectionString="Data Source=555.555.555.555;Initial Catalog=ManEx;User Id=manexUser;Password=thisIsmypassword;" />
After you have modified the string text, save the file and connect to your site. You will need to do the same thing for the ManExService.exe.config file in the Program Files/ManEx/MxService folder for the manexSQL service installed on your server.
Note: In order to access the manex web application from the button in the desktop, the web address to manexCloud must be set up within the System Appearance module.