1. Log into manexCloud, then locate the Setup section, and select "User Defined Fields:

2. Once you have selected User Defined Fields, the below screen will appear:

3. Select a section to open, located on the left-hand side of the screen. The example below opens the BOM Details section displaying the UDF.
Note: the screen will display different content depending on what section is selected.

4. In your selected section, you can add and delete fields, but you cannot modify their settings. Depress "Add new UDF" (see red box below) and the following screen will be displayed (see green box below):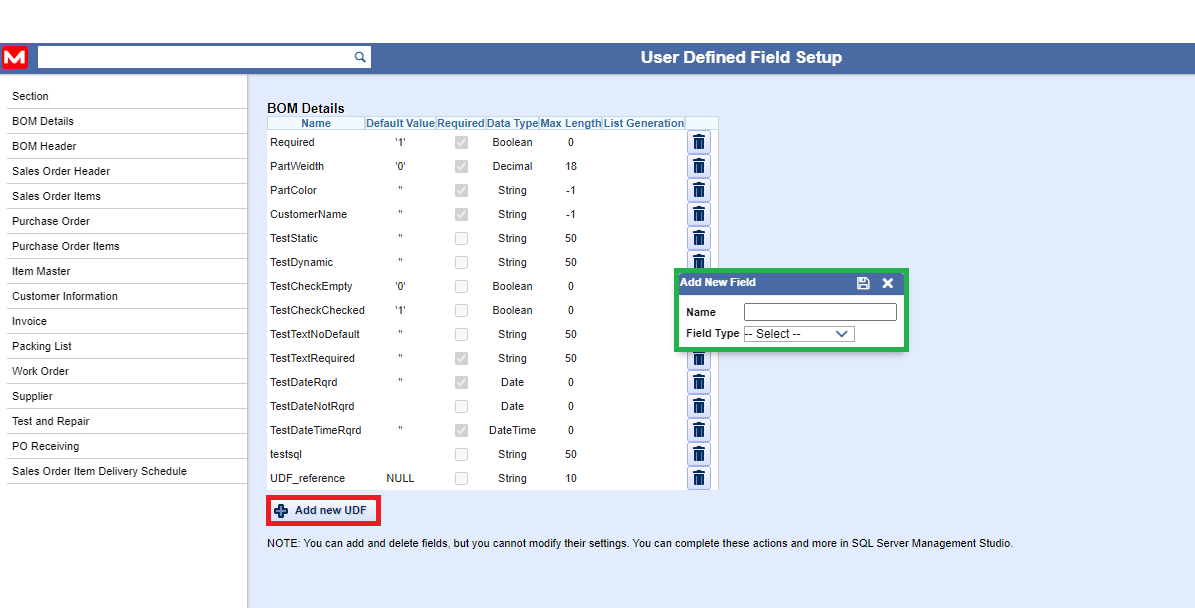
5. Enter a name and select the field type from the drop-down list. Once the field type is selected, you will be able to add the following: default value, check the Required box, and add max length (if applicable).

6. Once you are done, select the Save icon located on the top right of the screen:
7. The user-defined fields can then be linked to the following:
- inventory PN
- purchase order
- customer
- packing list
- invoice
- sales order
- bill of material
by selecting a record in the manexDesktop, and pressing the UD action button (as displayed below)

8. The UDF for that section will then be displayed, and you can make changes (if applicable), save & exit, or cancel.
